Need training at your office? Request a quote for custom training.
Adobe Acrobat DC: Adding Description Fields to Multiple PDFs
By Barb Binder, Adobe Certified Instructor on Acrobat
Updated Nov 18, 2020 for Acrobat DC
Yesterday, I found myself in the undesirable situation of having just created 50+ PDFs that were ready to be sent to the client, only to realize that I forgot to enter the description fields… on all of them! (If you are not familiar with description fields, check out Adobe Acrobat: Adding Description Fields to Document Properties.)
The files were all chapters within one large FrameMaker document, and needed the exact same fields. I could have sighed (read: cursed), returned to FrameMaker, entered the File Info into the book document, and recreated all of the PDFs, but it seemed like a good time to try out the Actions Wizard in Adobe Acrobat. Turned out to be pretty darn easy to retrofit all the files with their description fields. And even better, I now have the action ready to go, in case I make the same mistake again.
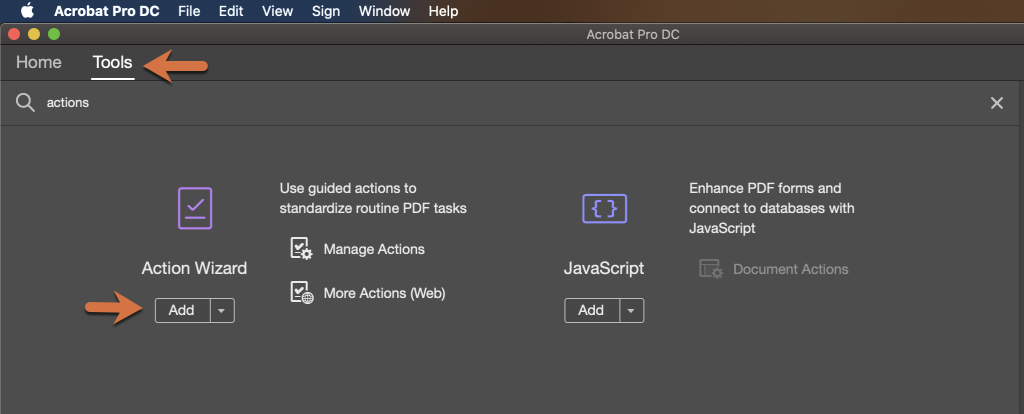
- In Acrobat Pro DC, start by adding the Actions Wizard to the Tools panel on the right.

- Click to open the Action Wizard in Tools panel on the right.
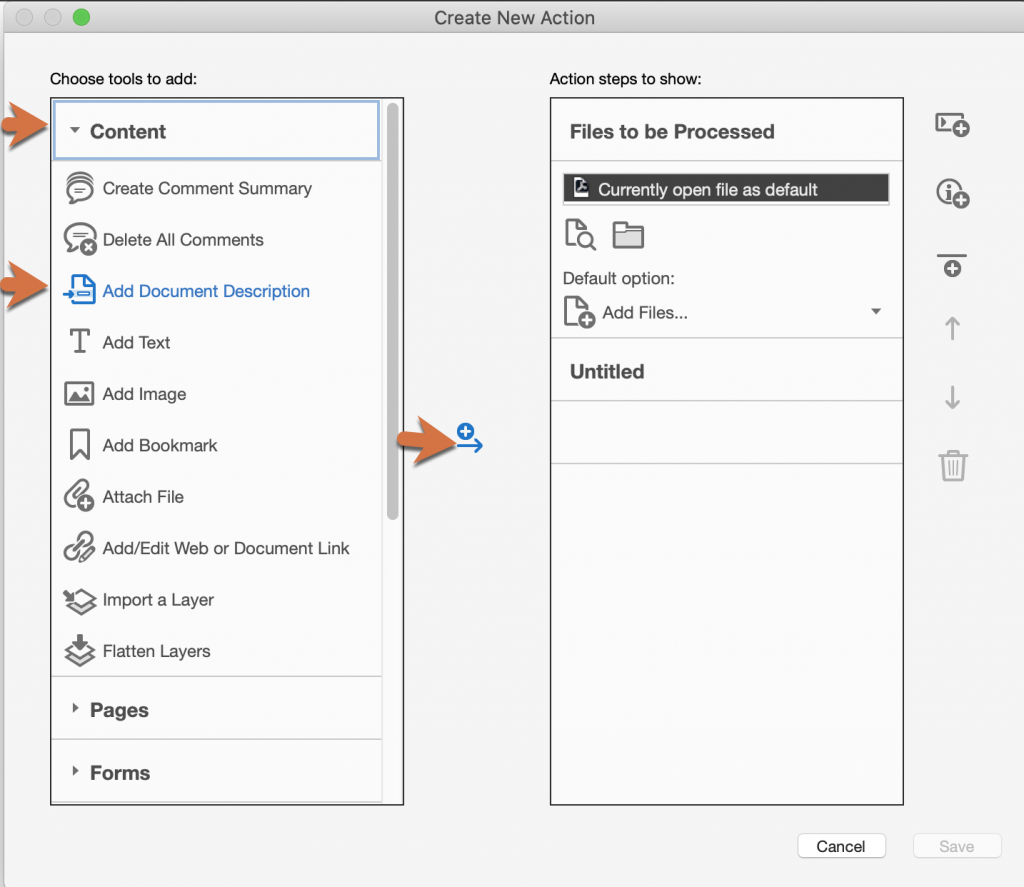
- Click on New Action on the navigation bar at the top. The Create New Action Wizard opens.
- In the Choose tools to add column, click Content, then click Add Document Description.
- Click the right-pointing arrow to add it to the Action Steps to Show column.

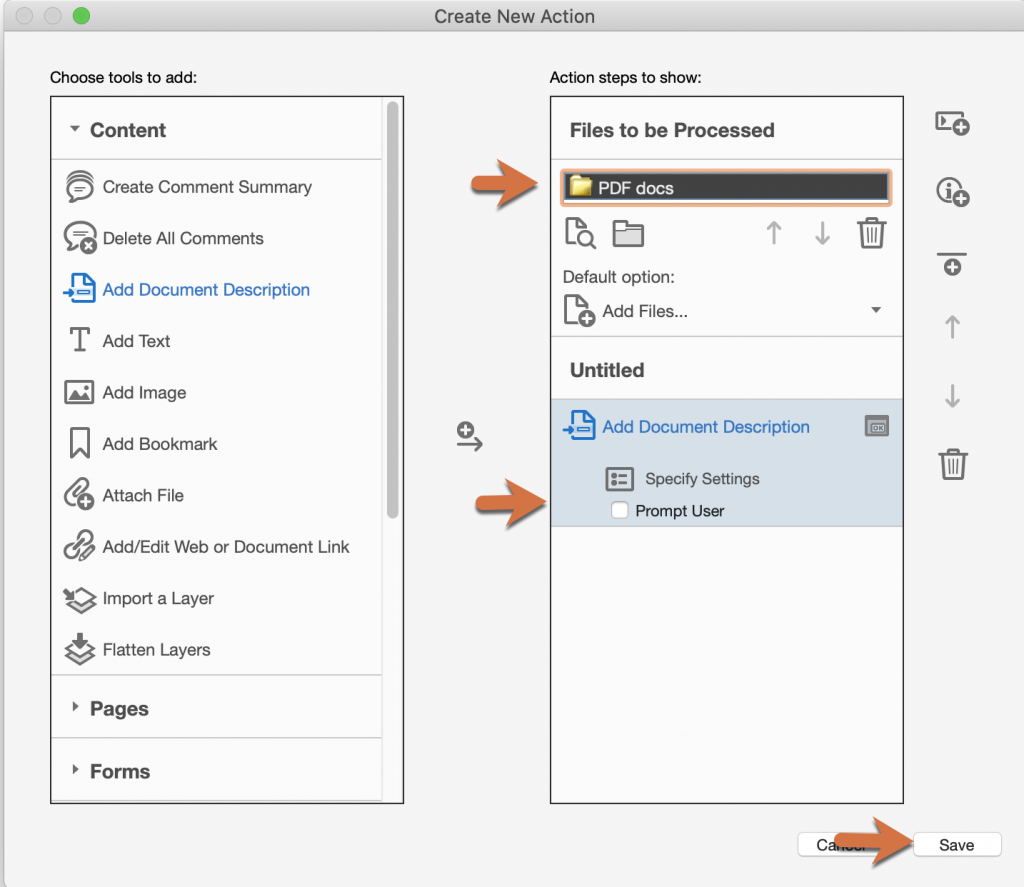
- Next, select where the files are that need to be processed. The choices are open files, a specific folder or add files. (I export PDFs from FrameMaker to a PDF docs folder in my project folder, so that’s what I chose.)

- You have the option enter Description fields now, or you can leave Prompt User enabled, and Acrobat will prompt you to fill in the fields when you run the action. It will prompt for every single file, so if they need to be the same, disable the Prompt User checkbox and add the fields now. Be sure to disable Leave As Is or you won’t be able to enter the metadata fields. Click on OK.

- Review your work, and choose Save to save the action. Give it a name and brief description and click Save again.

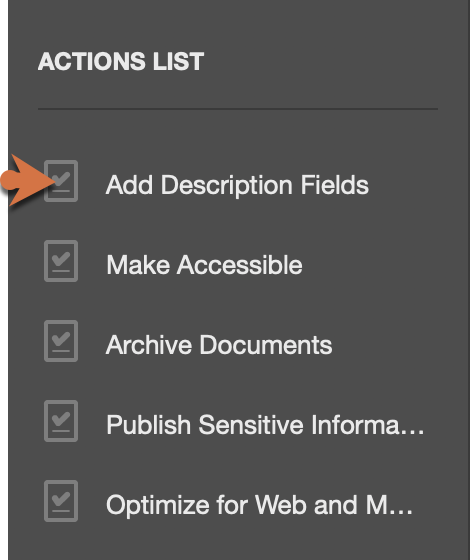
- The action will appear at the top of the Actions list.

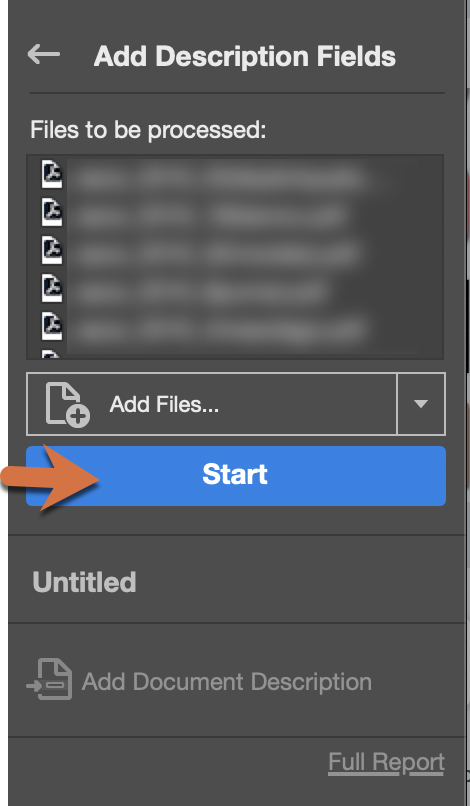
- Just click the name to run the action and click on Start.

You can return to the Actions Wizard at any time to create new actions, or edit existing actions. If want to use this action on a new set of files with different description fields, just edit the action.


Clear and MOST helpful–many thanks! I looked and looked for this information.