Need training at your office? Request a quote for custom training.
Adobe FrameMaker: Adding a Drop Cap
by Barb Binder
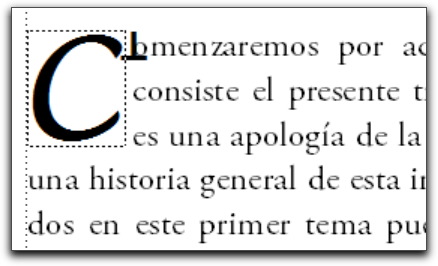
Adding a drop cap in FrameMaker is easy, right? Just activate the Apply Drop Cap checkbox and specify how many lines to drop down? Ha! I wish. Sadly, there is no drop cap feature in FrameMaker, but that doesn’t mean you can’t have one. You just need to know how to create it yourself.
- Place your cursor at the beginning of the paragraph where you’d like to have a drop cap.
- Remove the first character.
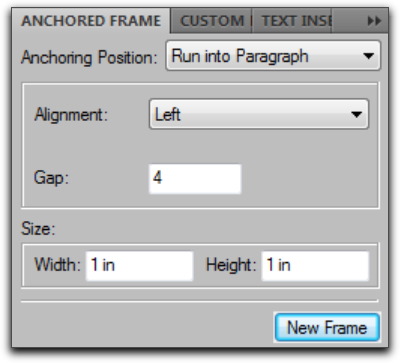
- Choose Special menu > Anchored Frame.
- Change the Anchoring Position to Run Into Paragraph

- Set the Alignment to Left.
- Set the Gap to 3 or 4 pts. (The Gap is the space between the edge of the frame and the edge of the text to the right and below the frame.)
- Set the size to about 1 in x 1 in to start.
- Click on the New Frame button to add the frame to the paragraph.
- Open up the toolbox, if necessary, with Graphics menu > Tools.
- Select the Text Line tool*.

- Click inside the frame and add in your character.
- Format it to the desired size and style using the Character Designer. (If you plan to use more than one drop cap, I’d recommend making a character format that you can use for the other ones as well.)
- To finish up, drag the letter to the top left of the frame with the Select Object tool, and then adjust the frame edge to match the size of the letter.


Ok, it’s a little fussy, but it works!
* For a more interesting and/or ornate drop cap, consider creating them in Photoshop or Illustrator, and then import them into the frame.


