Need training at your office? Request a quote for custom training.
Adobe FrameMaker: Automatically Assigning Custom Master Pages
by Barb Binder, Adobe Certified Instructor on FrameMaker
Updated: May 22, 2020
Note: If you are new to custom master pages, you will want to review Adobe FrameMaker: Creating Custom Master Pages before continuing.
Custom master pages are used in our FrameMaker documents to suppress page numbers on the opening page of a chapter or anytime we need a layout that differs from those of the default left and right master pages. Once you have set up your master pages, you can assign them manually with Format > Page Layout > Master Page Usage. That’s great, but isn’t there a better way? Absolutely.
In one of my publications, each new chapter starts on the next blank page (and not on the next right page, like so many others). I use a custom master to set the opening look for each chapter, but I need one for right page opening pages, and one for the left page open pages. Years and years ago, I had to do this manually, and inevitably missed a few during last minute edits.
What’s a girl to do? How about setting up a Reference Page table to do the work for me? By setting up the MasterPageMapping table, I can assign master pages to body pages that contain specified paragraph tags. I learned pretty quickly that if I delegated the master page assignments to FrameMaker, I’d never make that mistake again.
Here’s how:
- Create your custom Master pages. I called mine FirstRight and FirstLeft.
- Navigate to Body Page 1 and click on your chapter title style.
- Jot down the exact spelling of the paragraph style name. If you use the default FrameMaker paragraph formats, this will probably be called “Title”.
- Choose View > Reference Pages.
- Click the Next Page button until the five-column UnstructMasterPageMaps table appears. If you don’t see the table below, move on to step 6. If you find the table below, skip to step 7.

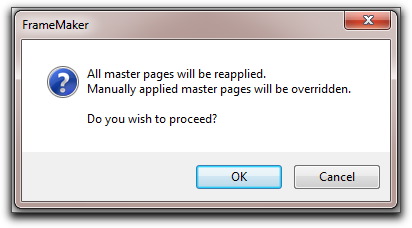
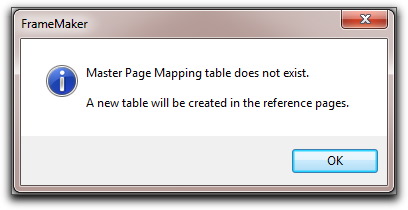
- If the mapping table does not appear in the reference pages, choose Format > Page Layout > Apply Master Pages. Click OK to proceed. (Note: you may not see either of the next two screen shots in the some versions of FrameMaker.)

- Click OK to create the new table on the reference pages. [Note, this message appears in the Console. In older versions, it was hidden under the FrameMaker document window. Beginning in FrameMaker 2017, the Console moved to the dock on the right, and will be visible.)

- On the new reference page, make the following updates: For Book Update (Yes Or No), type Yes to allow the specified master page to be applied when you choose Apply Master Pages from a book.

- Under the Paragraph Tag Name column heading, type the name of the paragraph style to which you want the master page to be applied. In my example, I am using Title. You must spell the paragraph style name correctly, using the same capitalization that the paragraph tag uses.
- In the second column, type in the custom Master page for all right pages that have a Title style. In my example, I’m applying FirstRight. Do the same thing for the left pages, but use the left opening page.
- Under the Range Indicator column heading, type Single to apply the master page only to the Body page on which each paragraph tag appears. (Type Span pages to apply the master page to the entire span of pages to which the paragraph tag is applied; or type Until changed to apply the master page to all pages, until the next Body page with a different paragraph tag listed in the mapping table is encountered.)
- Optionally, add notes to the Comments column. Text you type in this column does not affect how master pages are applied in any way.
- When you are done, choose View > Body Pages.
Ready for the magic?
- Open your Book window.
- Import the mapping table to the other files in your book.
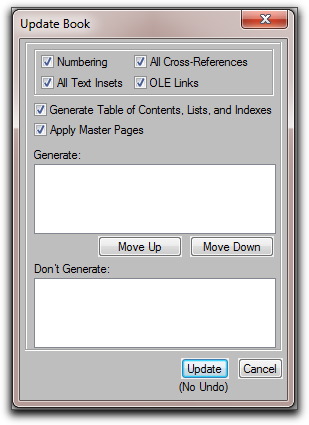
- Update your book. Be sure to check Apply Master Pages before you click update and FrameMaker will read the mapping table in all of the chapters and apply all of the custom masters for you, automatically.

More on working with master pages
Master page basics
Using variables in headers and footers
Adobe FrameMaker: When Chapter Titles are Too Long for a Running Head
Rotating pages
Adobe FrameMaker: Adding a Landscape Page to a Portrait Document


LOVE this blog! Really nice work.
Question possibly related to the Automatically applying a master page entry–
I want a paragraph to appear at the very bottom of the last page of a doc. The paragraph will contain disclaimer-type info. There will be other content on the page, and it will be of varying length.
Any ideas?
Cheers,
Stacy
Hi Stacy: how about creating a paragraph format called BodyLast, assigning it to the final paragraph of each chapter, and using that to call in the disclaimer page?
~Barb
This is really helpful! But what do you do when you have a big book with lots of files in it already and you need to run this procedure?
There is a checkbox to Apply Master Pages in the Update Book dialog box so that you can apply all of the master pages at the same time you update your book.
~Barb
Thank you, you’re amazing 🙂
I cannot apply this condition to cases where I have table that run on several pages (even though I’ve included the table format in the mapping table). Do you know why this happens?
Thanks again!!
Maybe you have an idea.
the titles in my doc are in a sort of text box, and the text flow begins lower down.
I can set up that all Heading1 apply the master page called Title for the first pages of each chapter.
However, if the Heading1 has a lot of text the text box at the top of the page must be bigger and we use a different master page called LongTitleFirst.
Is there anyway we can make this work with the automatic master page application?
No, but why not use a large enough text frame on the master to accommodate both situations?
~Barb
This is an awesome post (and site!)! Any ideas on how to use it with the last page in a file, when the Make Page Count Even feature is used? A page is added at the end to make the page count even, but there is no body text on the page, and therefore no paragraph tag to reference. I want to be able to put text on those pages via the master page.
Hi Jean:
Here is a “hack” that could do it for you.
Credit to Bob Niland on the Adobe Community forum: https://forums.adobe.com/message/4129072#4129072
I’ve never tried this, but a more elegant solution, not requiring a 3rd-party app, would be to implement a Left Master Page hack.
Now, all left pages without triggering content will be the TPILB page. Pages with content get mapped to the real {Left.Used} page. If you are already running AMPs to set start-of-chapter pages, there is no extra work in your workflow.
~Barb