Need training at your office? Request a quote for custom training.
Adobe FrameMaker: More on customizing a table of contents
by Barb Binder, Adobe Certified Instructor on FrameMaker
Updated: May 23, 2020
In a previous post, Adobe FrameMaker: Adding Tabs to a Table of Contents, I talked about how to use the TOC Reference page to add the missing tab between a table of contents text entry and the page number that follows it. Here are a few more TOC tips:
- As a general rule, don’t ever edit the text on a generated page, because all edits will be lost when you update the book and the file is regenerated.
- If you want to have a title that will actually stay after you update your book then you have to make sure that a.) the title is the first thing in the flow (titles usually are, so that’s easy) and b.) it must have a paragraph format that does not end in the suffix for the generated file. For example, TOC is the standard table of contents suffix, so you could call your contents title ContentsTitle, but not ContentsTitleTOC.
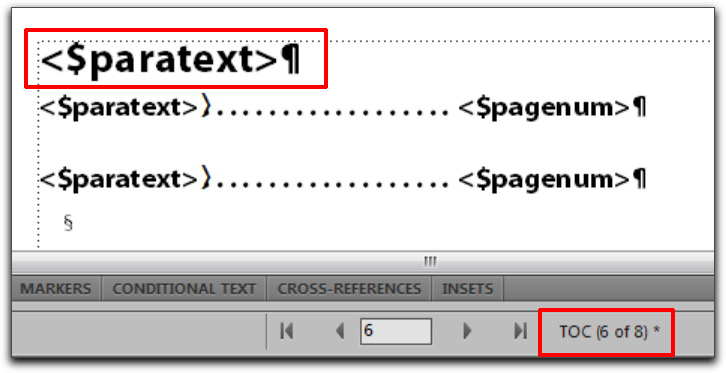
- If you want to remove the page numbers from a top level TOC entry:
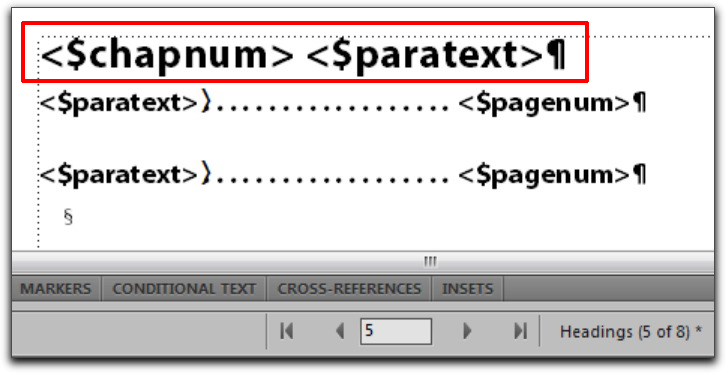
- If you’d like to add the chapter numbers in front of the chapter titles in your table of contents (assuming the chapter titles are numbered with the <$chapnum> variable):
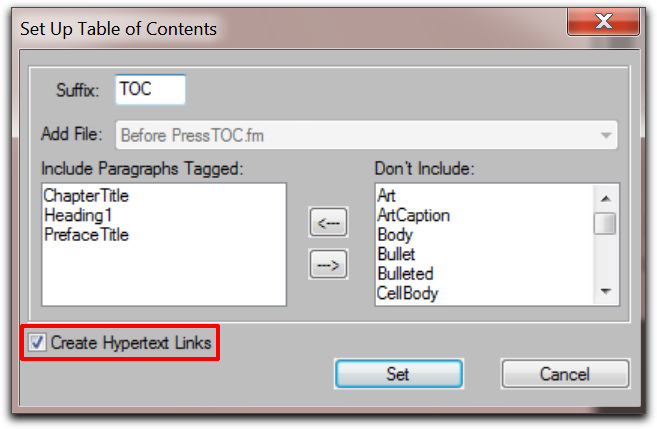
- When Create Hyperlinks is turned on, you can press Ctrl + Alt as you click on a table of contents entry to follow the hyperlink into the file. If it isn’t turn on, you’ll need to right click your TOC in your book window and choose Set up Table of Contents. Check the Create Hypertext Links checkbox and links will be enabled when you choose Set:

More posts on using generated files in FrameMaker
Adobe FrameMaker: What to know about working with generated files
Adobe FrameMaker: Including chapter numbers in a table of contents
Adobe FrameMaker: Removing bold from page numbers in a table of contents


I set up my TOC with the Create Hypertext Links option checked and then saved it as a PDF. The links do not seem to work in the PDF. Any tips on how to correct this?
Hi Dustin:
Are you using FrameMaker 2019? And are you using File > Save as PDF and not Print to PDF?
~Barb
When I right click TOC in my book window, Set up Table of Contents option is greyed out. Any idea why I cannot edit TOC.
Hi Shankar:
Only FrameMaker-generated files will have the “Set Up XXX” available. Generated files will have an orange and black icon in the book window to differentiate them from user-created files. I suspect that the TOC was previously removed from the book and added back as a user file with the orange and white icon, using Insert > Files and not Insert > Table of Contents.
~Barb
Framemaker 20–I publish my document. Then I open the pdf document in Acrobat Pro. When I select edit pdf, then link-add/edit web or document link…I see differing lengths of link boxes. For example, I have a CHAPTER 1–INTRODUCTION. The link box only stretches to emcompass CHAPTER 1–(it doesn’t encompass the word INTRODUCTION). My first paragraph heading is 1.1 Purpose……….1-1. The link box only stretches to encompass 1.1 Purpose. It does not cover all the way across to the page number 1-1. However, on my first subparagraph (1.1.1 Statement of Purpose………..1-1), the link box stretches all the way over to the page number. So I am having to edit my links for chapter headings and paragraph headings, but not subparagraph headings and drag the box so it will be clickable on any portion of the line. On my List of Figures and Tables, all the links stretch across the page. No issues. So it has something to do with my chapter and first paragraph formats. Please help!!
Hi Jason:
The use of Character Styles limits the hyperlinks in any paragraph, TOC or otherwise.
~Barb
Thanks–nailed it! Turns out we use a created character style (chText) for the chapter title and a bold character style for the first paragraph.
CHAPTER —
\ –
\ – (this one has a bold character style)