Need training at your office? Request a quote for custom training.
Adobe InDesign: Removing Text Wrap Offsets from Graphic Frames
by Barb Binder, Adobe Certified Instructor on Adobe InDesign CC
Updated Mar 17, 2016
From a past Rocky Mountain Training student:
Hi Barb, I am trying to set up my graphic box defaults so that every time I create one, the text wrap will always stay at 0 inches on all four sides. I tried the following: closed out of the document I was working on, selected the graphic box, and made the changes to zeros. Then I opened up my document and it still wants to default to .139 in on all four corners. Is there a way to change this in a current document or will it only work for new documents? Thanks so much for your help; I hope all is great with you!
So close! Changing the defaults with all documents closed will change the behavior of all new documents. The ones that are already created will not be impacted. To change the behavior in the current file, just deselect everything and change the graphics frame default. For now on, that will be the default in this one document.
In either case, I’d recommend approaching this via editing the Object Style called Basic Graphics Frame.
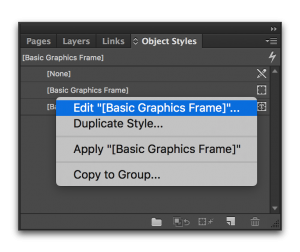
- Window > Styles > Object Styles
- Hover over [Basic Graphics Frame]. Right+click > Edit [Basic Graphics Frame]

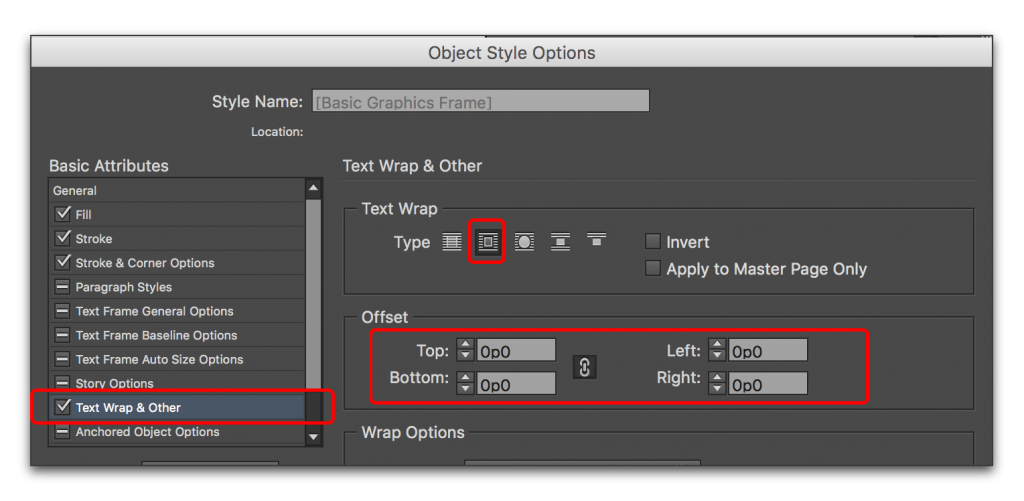
- Customize the options in the Object Style Options dialog box. For this specific question, our student wants Text Wrap on as default, but wants the Offsets set to zero on all four sides. Click OK.

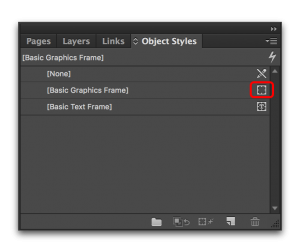
- As a default, new frames do not use an object style.* To make sure all the new graphic frames use this text wrap setting, the final step is to drag the little square from None to Basic Graphic Frame. The square indicates which style will be applied to the new graphic objects.

* This has changed in InDesign CC 2015: new graphic frames will automatically use [Basic Graphics Frame], so the square is already in place.


