Need training at your office? Request a quote for custom training.
Adobe InDesign: Using Rules & Underlines Together
by Barb Binder, Adobe Certified Instructor on InDesign
Updated: May 24, 2020
This post marks the sixth and final entry in the series on InDesign underlines and paragraph rules. Now that you have a solid foundation, here are some fun ways to tie all this information together. For these next tutorials to work, you must add a rounded endcap stroke style to your Stroke Panel, and have basic knowledge of custom underlines and reverse heads. If you run into trouble, review the following three posts:
- Adobe InDesign: Creating New Stroke Styles (to add the rounded endcap for this tutorial)
- Adobe InDesign: Custom Underlines (to control the look and position of underlines)
- Adobe InDesign: Reverse Heads (to define a rule above that prints behind a one-line heading)
The goal is to see if we can format these three paragraphs using character and paragraph commands::
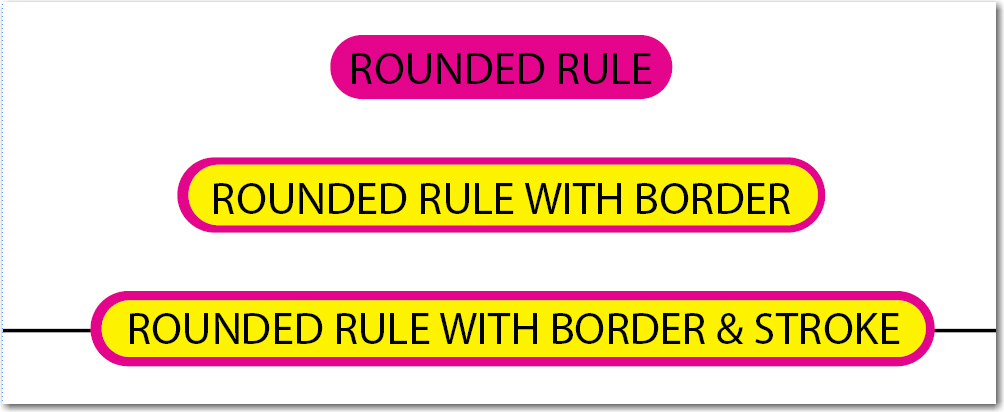
Reverse Heads with Rounded Endcaps
- Select a one-line heading
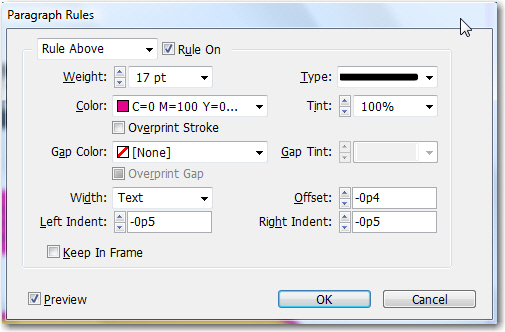
- Open up Paragraph Rules with Ctrl+Alt+J (Cmd+Opt+J)
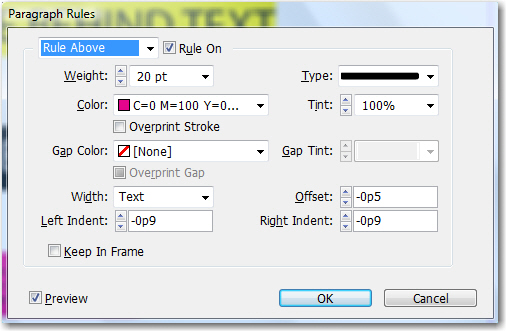
- Enable Rule Above Paragraph to define a Reverse Heading: remember to choose your rounded endcap style from the Type list in the Paragraph Rules dialog box, and to adjust the left/right padding on the rule by defining negative values on the Left & Right Indents in Paragraph Rules. (Don’t have a rounded end cap style in the list? See Adobe InDesign: Creating New Stroke Styles to learn how to create one.)

- Does it look like this?

Reverse Heads with Rounded Endcaps and a Border
The trick to this one is to recognize that ruling lines have a stacking order. If you define both a rule above and a rule below, and use the offsets to set one of top of the other, the ruling line below always shows on top.
- Select a one-line heading
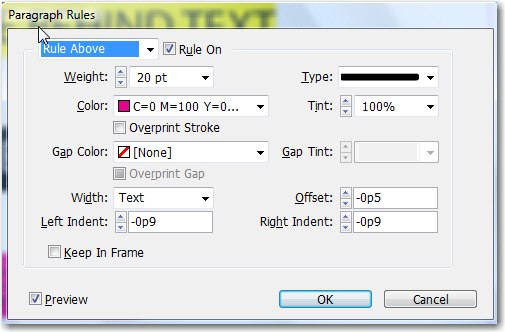
- Open up Paragraph Rules with Ctrl+Alt+J (Cmd+Opt+J)
- Enable Rule Above Paragraph to define a Reverse Heading. I’m using a taller line, the rounded endcap style and extra indents on the left and right.

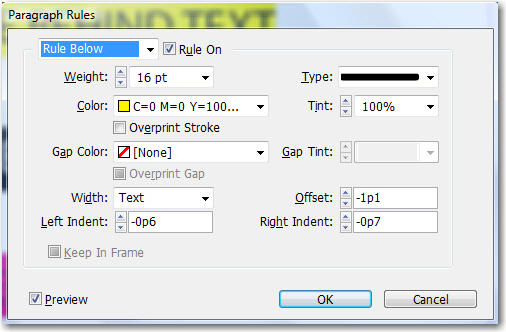
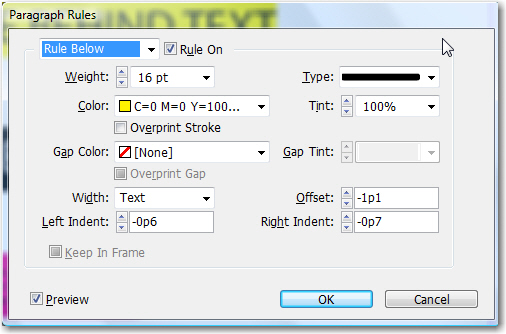
- Enable Rule Below Paragraph to define a second thick line, again with the rounded endcaps. This time, use the offset to shift the rule up over the rule above. Make sure it is slightly thinner than the rule above and use the offset to center it vertically over the rule above (which is now behind, but don’t get me started).

- Does it look like this?

Reverse Heads with Rounded Endcaps, a Border and a Rule
The trick here is again the stacking order, but we only have two rule options and we want a total of three lines. Got any ideas? Did you say a custom underline? We have a winner! Underlines always print over the ruling lines, so working from the bottom up, we need a thin rule above, a thick rule below and a customized underline on top.
- Select a one-line heading
- Open up Paragraph Rules with Ctrl+Alt+J (Cmd+Opt+J)
- Enable Rule Above Paragraph and define a thin, black, column-wide rule:

- Enable Rule Below Paragraph and define a thick line. Use the offset to shift it up, and allow some extra left and right negative indents:

- Finally, add a few spaces on either side of the text and select the text plus the spaces.
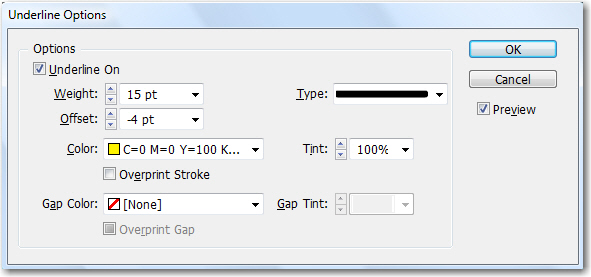
- Click on the Underline button on the Control Panel, and then, Alt/Opt click the button a second time. Define a thick underline, and use the offset to position it:

- Does it look like this?




This is very helpful! I needed to create a white box with a black border to appear behind a number for certain lines of text for a publication that I’m working on. The box needs to appear automatically using paragraph and character styles. No graphics could be used and no additional fonts could be utilized to create the effect (zapf dingbats, wingdings, etc.). Nested character styles didn’t really work either, since they didn’t fit the width of the line numbers correctly. That made the project a bit tricky until I came across this. With a little bit of re-working, I used your method to make the line numbering work. Thanks for posting this!
Mark! That’s awesome. Thank you so much for letting me know. ~Barb