Need training at your office? Request a quote for custom training.
Adobe Photoshop: Adding a Vignette as a Creative Effect
by Barb Binder
In photography, the term “vignette” refers the darkening (or sometimes lightening) the edges of an image, as compared to the image center. Sometimes vignetting is an unintended and/or undesired effect caused by camera settings or lens limitations. Other times, it is added after the fact as a creative effect. In the two images below, the original is on the left, a vignette was added to the one on the right to draw the eye towards the center of the photo.
In Adobe Photoshop, you can add or remove vignetting several different ways, primarily using a Lens Correction command. You’ll find a Lens Correction tab when you process images through the Camera Raw dialog box, but in this post, we’ll do it through the Lens Correction filter. Here’s how it works:
- Open an image in Photoshop CS4, CS5, CS6 or CC.
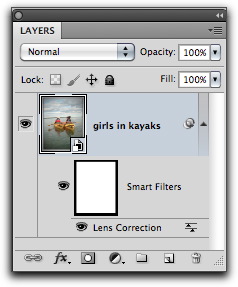
- Chose Filter > Convert for Smart Filters (to make the change as non-destructive filter effect, that can be edited or removed later), and pick OK to convert to a Smart Object.
- Chose Filter > Lens Correction (in Photoshop CS4 and earlier, the command was Filter > Distort > Lens Correction)
- Click the Custom Tab in the sidebar on the right.
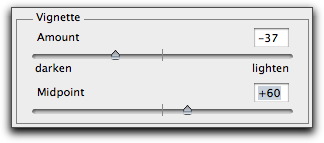
- With the Preview checkbox activated, adjust the amount and midpoint sliders to neutralize an unintended vignette, or to introduce one as a creative effect.

- Click on OK when you are satisfied with the results.
Remember, by selecting Convert for Smart Filters before you added the lens correction, you can hide and show the effect, or double click the Lens Correction effect in the Layers panel to modify it later.


Thank you very much…! 😀
Thank you. It works
It was very, very helpful. Thank you very much…
thank you for the help… most exact tutorial online….
Awesome , You are the BEST
Thank you. I knew there was a simple way to do this, it was just a matter of knowing how. I’m surprised with how many people are achieving the same effect using so many different difficult means. This was really easy. Thank you.
Thanks a Lot!
Thanks.
Thanks
Great. Thanks